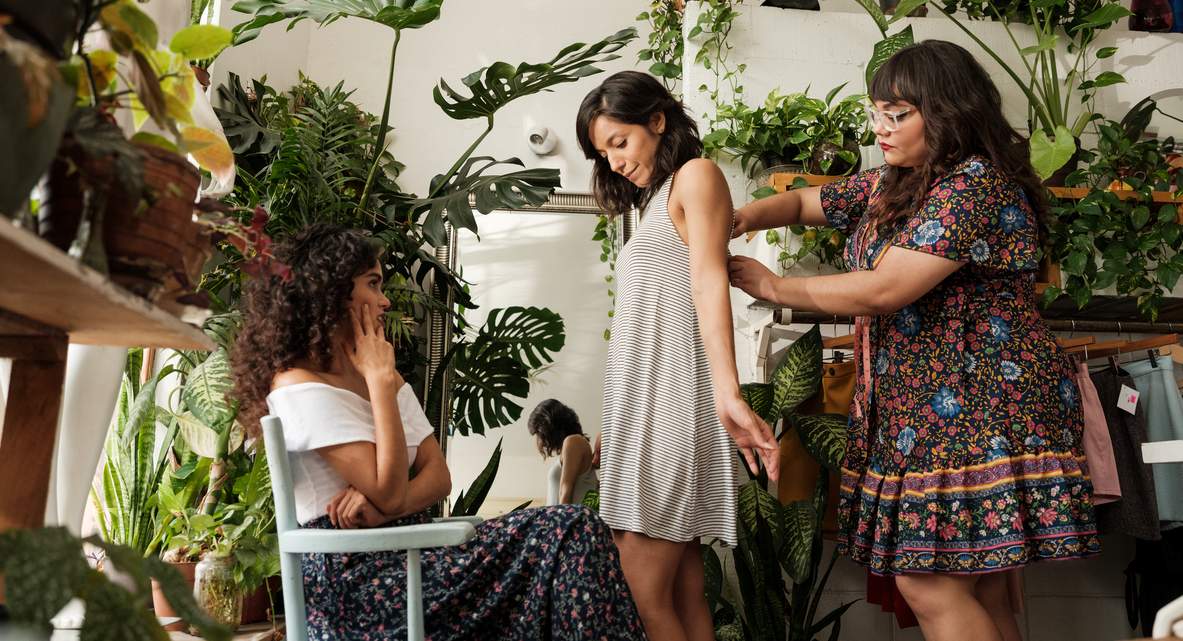
![]() Fitting garments is one of my favorite parts of the pre-production process! It is exciting to finally see your garment come to life, and a fitting session allows you to evaluate the garment in a tangible way. If you are not a professional seamstress or pattern maker, you may not know how to conduct a fitting session, or even what to look for. Lucky for you, I can help with that.
Fitting garments is one of my favorite parts of the pre-production process! It is exciting to finally see your garment come to life, and a fitting session allows you to evaluate the garment in a tangible way. If you are not a professional seamstress or pattern maker, you may not know how to conduct a fitting session, or even what to look for. Lucky for you, I can help with that.
Fit Model or Friends?
A common question from designers is: “Do I really need a professional fit model?” and the answer is –it depends. Let me explain what I mean.
Fit models are professionals who maintain specific body measurements, who have been trained on how to provide specific feedback on garment fit and construction, and also pay special attention to pain points within your garment fit.
They know their body, and what is not “perfect” about it. I had one fit model who knew his right shoulder was higher than his left by almost half an inch! This helped me adjust the hang of hems accurately, as well as how necklines fit on him.
Fit models maintain their measurements very specifically, so they will always fit the same way. There won’t be any changes to their dimensions over time, and this is essential if you want to have consistency in how your garments look over years of development. This tends to be more important for garments that are woven or very close-fitting to the body. It is less important for loose-fitting or amorphous garments.
In addition to always fitting the same, the feedback from a professional fit model can reveal things a “regular” person won’t notice until they have been wearing the garment for several hours or even over time. This can mean higher returns, or adding wear testing to your process.
Wear testing is when a garment is given to people across your size spread to be worn for a certain length of time, and then feedback is given, along with photographs of the testers in the garment.
Many fashion entrepreneurs avoid using professional fit models because of the cost. Fit models typically need to be booked through their agency for 2-4 hour blocks, and their minimum rate can be anywhere from $50-400/hour, depending on their experience. In the grand scheme of things, a few hundred dollars is far cheaper than an entire product failing to sell or being returned due to poor fit.
If you decide that a fit model is not the route for you, you can use friends and family. Be prepared for unsolicited advice on design, your love life, and your career, and a lot of nerves and laughter.
How To Conduct a Fitting Session
Now that you have decided on your fit model, it is time to review your garment. Every single person who needs to sign off on the garment should be in that room. This may be a whole fashion team, or it could be just you and your fit model. It’s so important to see the garment in person, ask questions, and also provide opinions. Also, bring any reference garments to the fit session, so you can compare your version to the inspiration.
Assign one person to take notes and photograph the fit model. I typically like to do this myself, as I will be the one communicating the changes to the pattern maker and I speak their language and know how to notate the needed changes. If you don’t know anything about technical design, THAT IS OK! You can still do this yourself. I am going to teach you an easy way to communicate your needs using photos and notes.
Remember to Take Photos
Photos are key to this process. Have your fit model stand, arms to the side, balanced between both feet. Take a photo straight on, without tilting the camera. These photos are not glamour shots. Instead, the photos must show flaws clearly.
Then, have your model turn to the side, bend their arm like Barbie, and take a side pic. Have the model rotate to the back, and take a back picture straight on. Throughout the fit session, take photos of any details that need correction. A picture is truly worth a thousand words when trying to communicate your needs.
For each style, notate the style name and number in your notes, or you will get confused later when you are transcribing. Ask me how I know. 😉
Have a mirror available for your fit model to look at themselves in. Allow them a short time to look at, feel, move in the garment before peppering them with questions. Watch them as they move and notice how they interact with the garment. Non-verbal cues are so helpful! Then, ask them how they feel, what they notice, etc. They will provide you with feedback. Take notes, and allow them to lead you.
What Am I Even Looking For?!
Here is a handy list of things to look for when checking the fit of the garment.
Please note: this list is not exhaustive, and will depend on the design intent of your garment. Always bring the technical sketch to the fitting session and the tech pack for reference.
Fitting Session To-Do List
- Side seams should be perpendicular to the floor (straight up and down), not swinging to the front or back, or twisting.
- The neckline should not pull to the front or back of the garment.
- Sleeves should be proportional to the length of the garment, and the design intent.
- Sleeve openings should not be too wide or too narrow.
- Garments should not have “whiskers” or “drag lines.”
- The crotch of the garment should not cut into the body, or hang too low below the body (unless this is the design intent).
- Sleeves should not bind when arms move.
- Pants should not gape at the back waist when sitting.
- Pants should be comfortable to sit in, move in.
- Jackets should not be tight across the back when arms are crossed in front of the chest.
- Hems should be appropriate for the garment: Is it too narrow? Too wide? Need a facing instead?
- Dress hems should hang parallel to the floor (unless it is an asymmetrical hem).
- Busts should fit comfortably in the garment: no drag lines between the apex of each breast, squishing of the breast tissue, etc.
- Bust darts should point to the apex of the breasts and should end roughly 1-1 ½” away from the apex of the bust.
- Waist darts should be parallel to the CF/CB of the garment.
- Shirt collars should roll nicely, rather than fighting to stand up or flay out flat.
- Buttons and zippers should be easy to use, in logical locations
- Pockets should be proportional, functional, and easy to get into and out of.
- Hoods should not pull the garment up and away from the body.
- Hoods should have a nice shape, not pointy (unless that is the design intent).
- Is the pant lying nicely across the posterior?
- Do the design lines look proportional and intentional?
There are literally hundreds of questions I could list for you, but the most important things are: the garment is easy to wear and use, looks proportional, and follows the design intent.
What Happens Next?
You have taken all the photos, notes, argued amongst yourselves, and made decisions. How do you get this information to your pattern maker? This is when your tech pack comes into play! You will need to notate all changes to the garment in your tech pack, labeled with dates of the change.
You should also create a tab that is specifically for the sample you are reviewing. For example: for a first prototype, label your tab P1 Review 2.12.2021, which is the sample number, what you are doing, and the date of the review.
Here are different samples you may be reviewing:
- P1, P2, P3 = Prototype Sample 1, 2, 3
- JSS = Jump Size Samples. These are samples to test the grade rule of your garments and are usually the base size, and then every other size in your size spread.
Example: Medium is your base size. Your size spread is XXXS-XXXL. Your JSS samples would be XXXS, XS, MED, XL, XXXL. These can be done in substitute fabrics and findings, and are to check fit exclusively.
NOTE: fabrication can change the fit. Use sample fabric as close to the real fabric as possible. - PP = Pre-Production Samples. These samples are the full-size range in all correct fabrics/findings and should measure perfectly on spec.
- TOP = Top of Production Samples. These are samples pulled randomly from production, in every size/color. These are to check spec, construction, and fabrications/findings. These should be signed, dated with the approval date, and kept forever as reference. If you have to switch suppliers in the future, these will be your new sew by samples.
- Photo Samples are just that: samples used for your product photography. These should be perfectly correct.
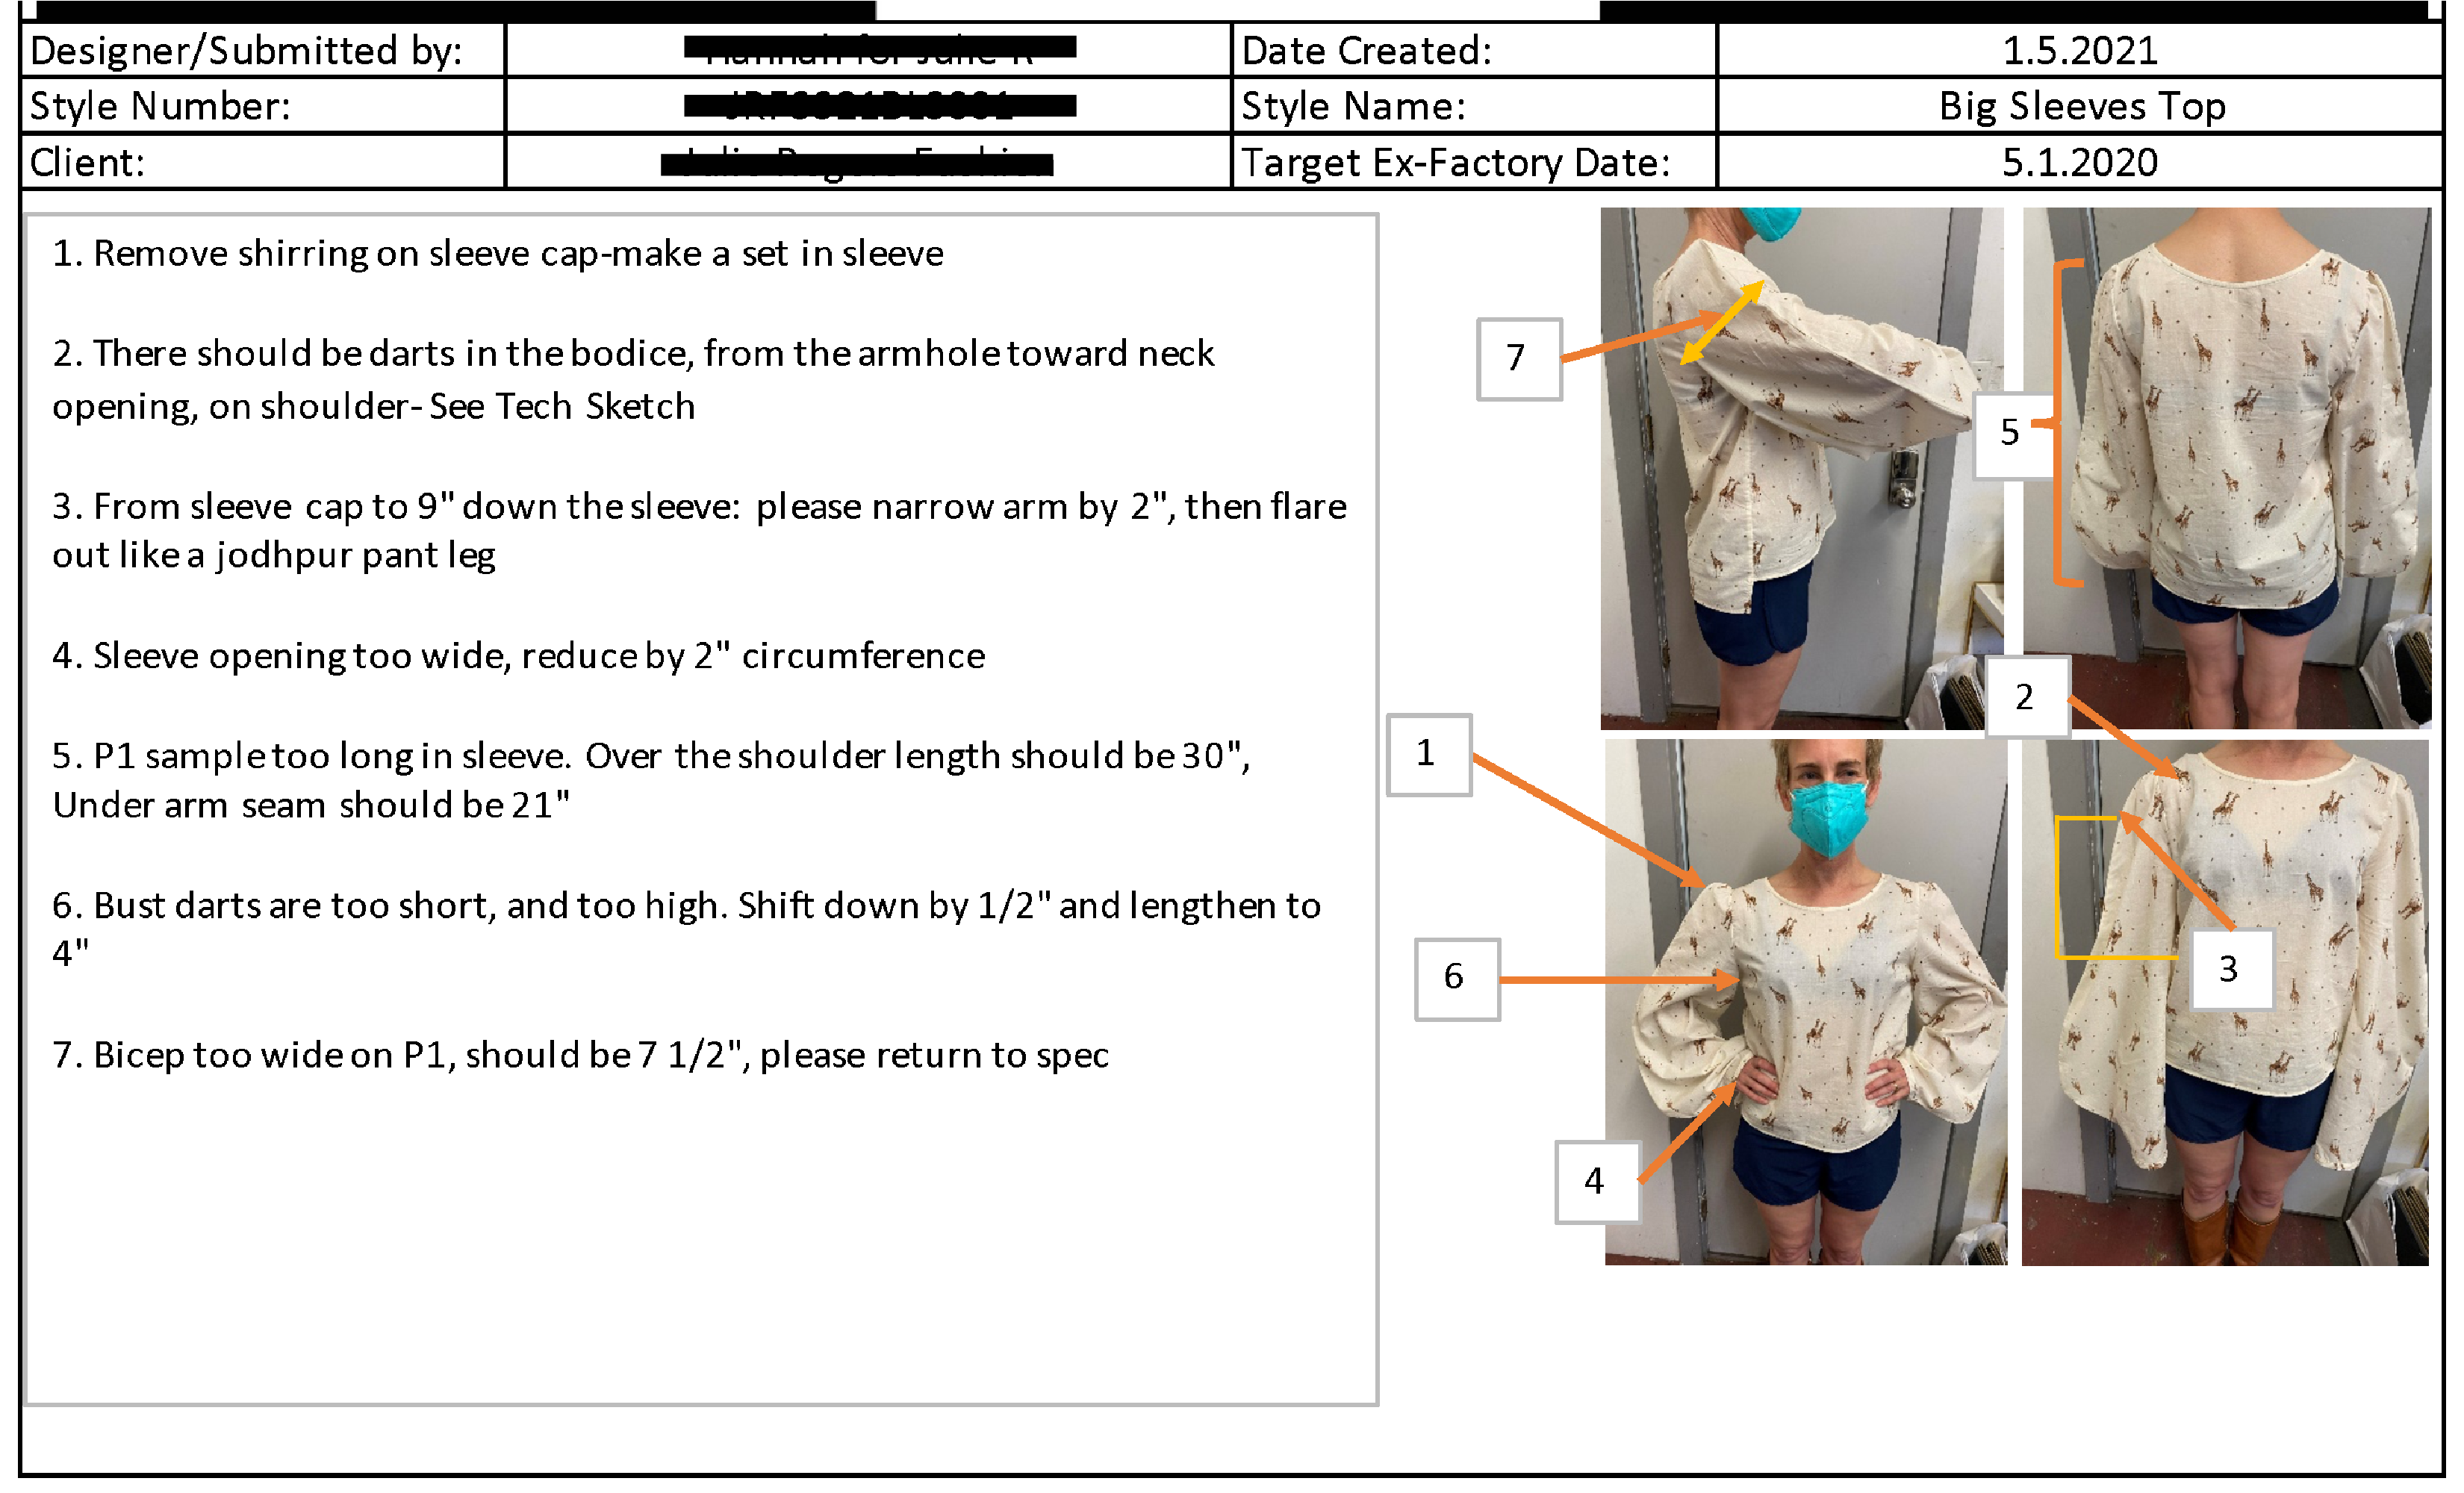
I have inserted a real client’s sample review below for you to see how I do my notes.

Sometimes notes require more information, such as technical drawings of details. You can add these into the tech pack review tab as well.
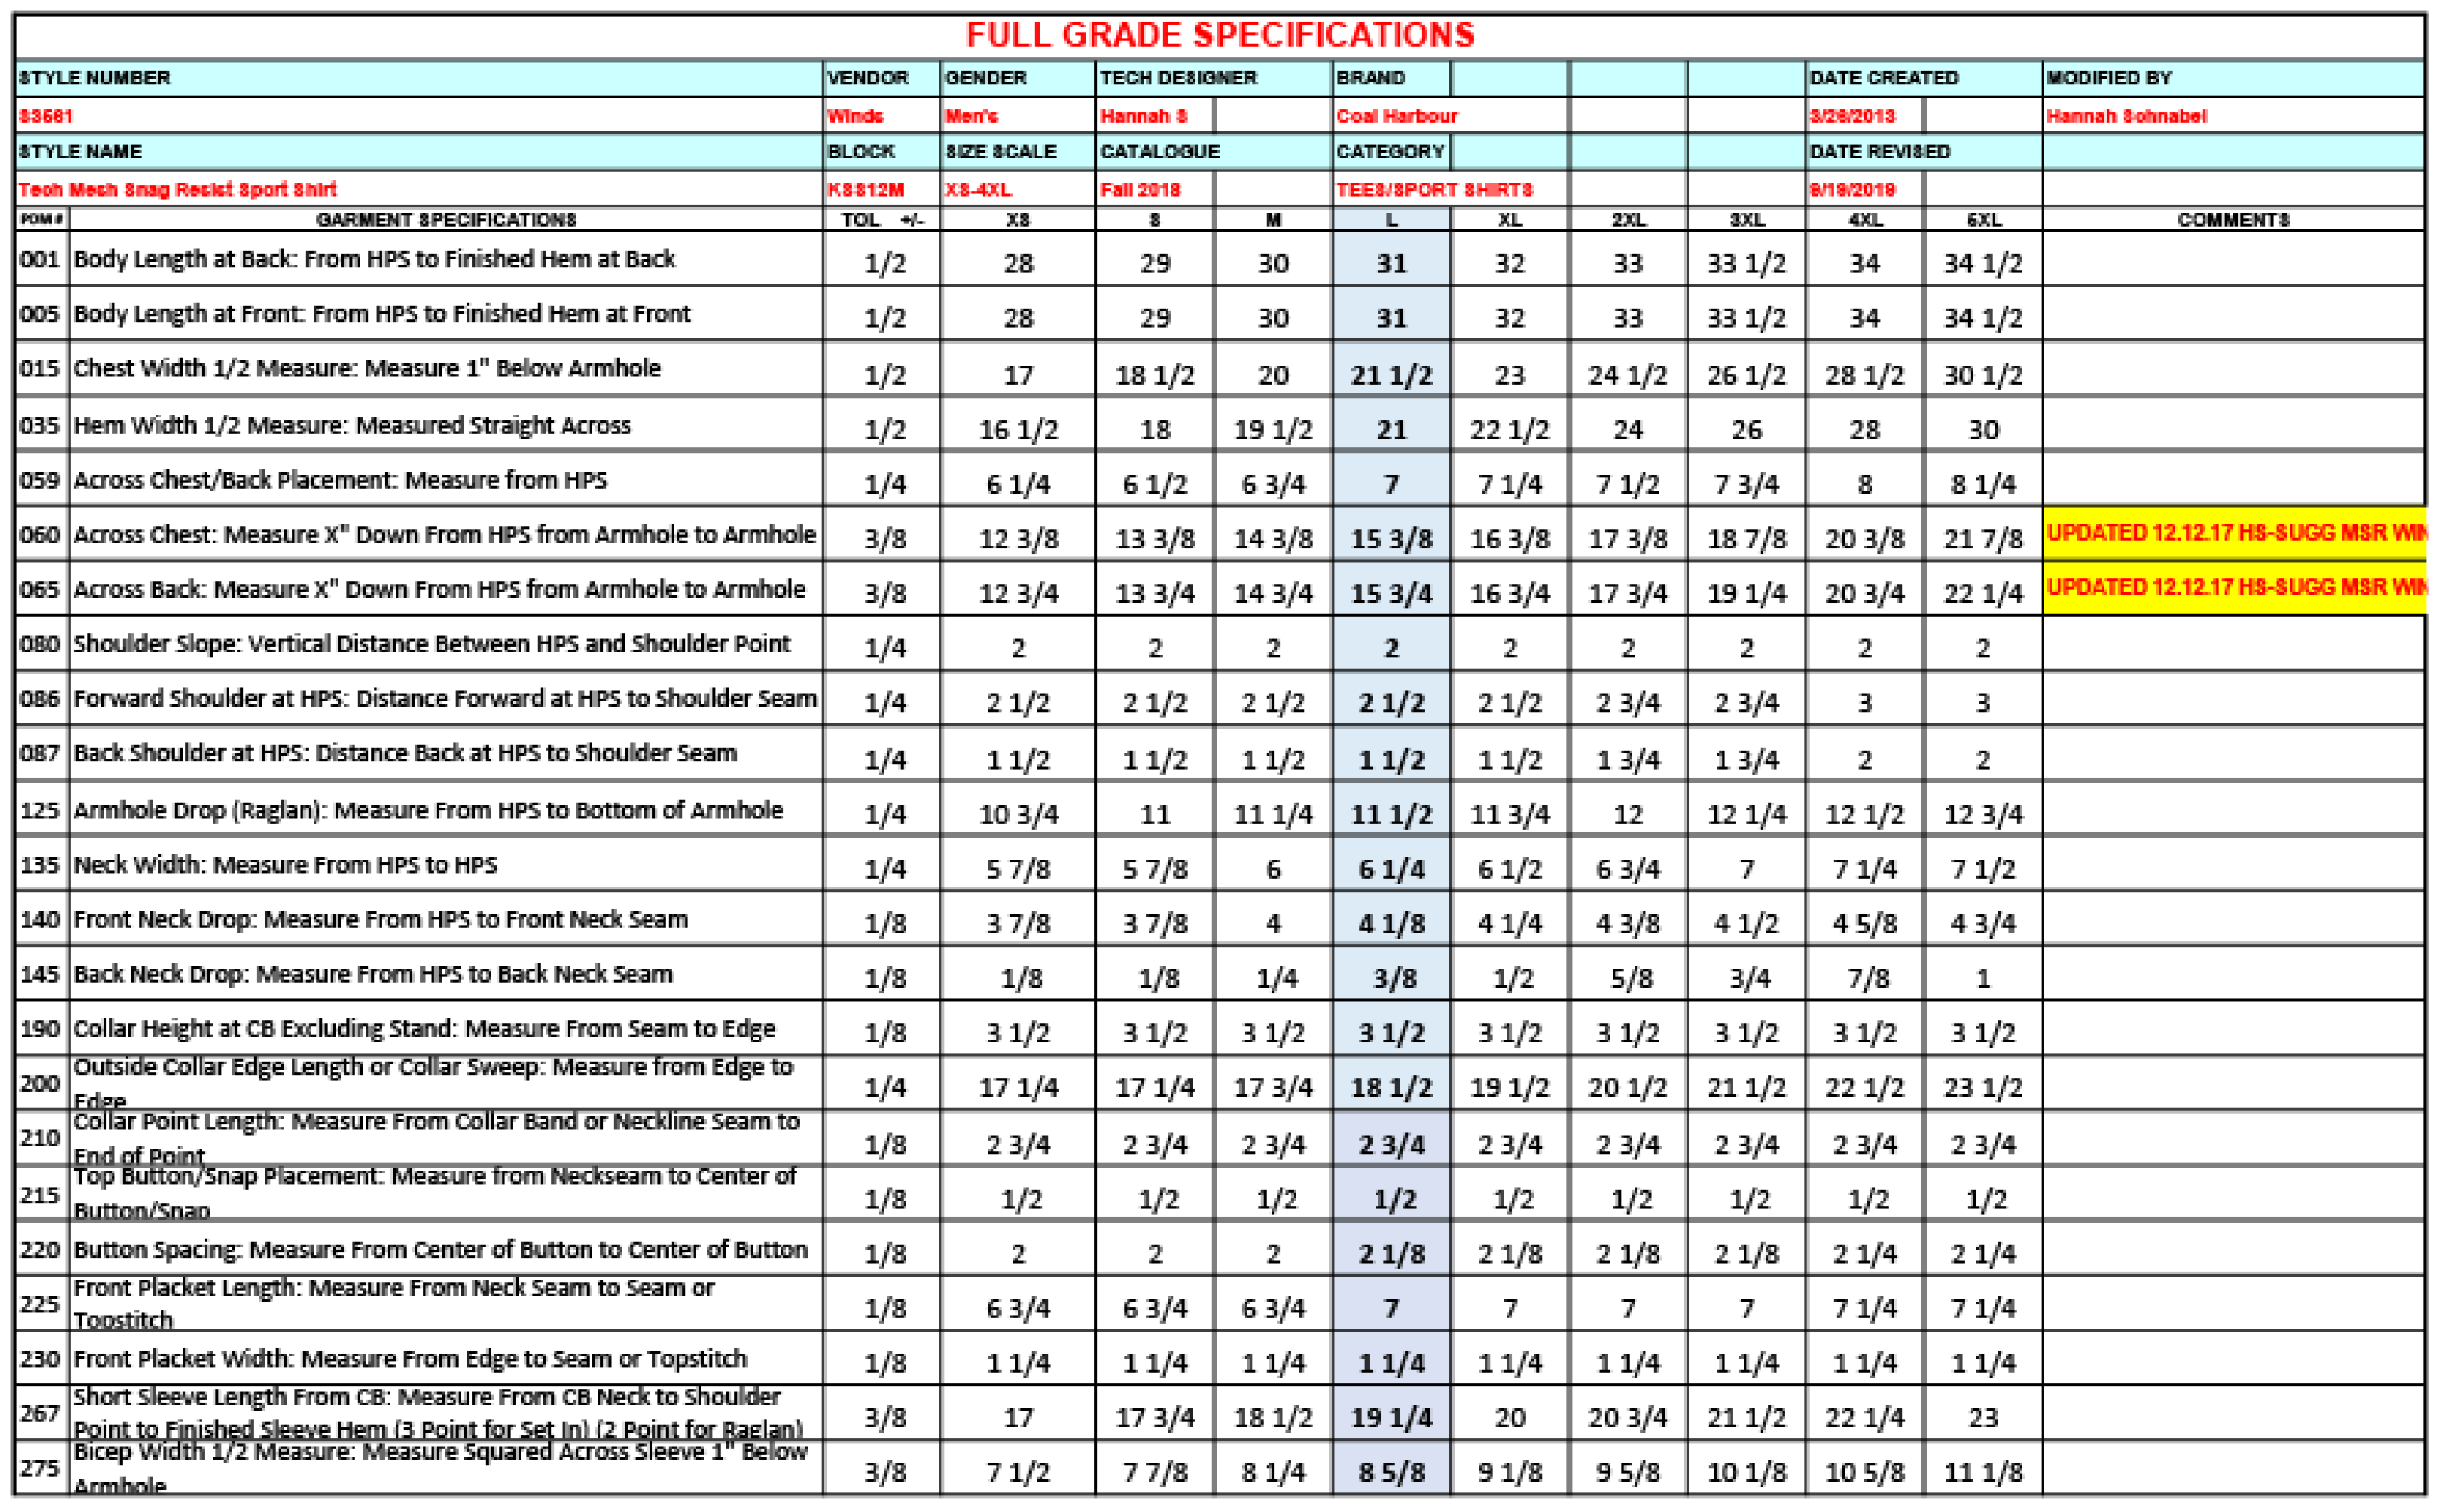
You may also need to adjust your specs, depending on where you are in the process of developing your product. I have inserted an image of a real product I developed with the specs altered after a fitting, so you can see what that looks like.

The equations for the grading are automatically updated with the change to base size, indicated here in the blue column. This information tells your pattern maker what to change for the next iteration of your product.
You Did It! Now You Know How To Conduct a Fitting Session
This is a lot of information, but fit sessions are the key to the success of your product. They are so helpful in finding issues before you put your product into the world, and help you learn to be a better designer. You will find the best way of communicating your changes to your patternmaker, and you will learn the lingo as you go. We hope this post helped answer the question “how to conduct a fitting session.” Have fun making your product beautiful and well-fitting!
